What is Cloudflare Tunnel?
 Image source: https://blog.cloudflare.com/zh-cn/post-quantum-tunnel-zh-cn
The principle of Cloudflare Tunnel is as shown in the figure. The cloudflared service is run on the origin server that needs to be accessed, and this service maintains a long connection with Cloudflare's edge nodes. When external users access the corresponding domain name, the request reaches Cloudflare's edge nodes and accesses the corresponding port on the origin server through cloudflared.
Benefits of using Cloudflare Tunnel on NAS
- No need for a home broadband connection with a public IP, and it can also enable mobile broadband to use IPv4 access
- No need to open ports on the router, making it more secure and preventing the broadband connection from being blocked due to web service scanning by the operator
- Currently, accessing the home network through Tunnel is relatively fast
How to enable Cloudflare Tunnel?
Resolve the domain name to Cloudflare
This step has many online tutorials, and new registrations on Cloudflare also have a guided page for adding domain names. Simply follow the steps to modify the NS (nameserver) of the domain name purchase service provider to the one provided by Cloudflare.
Note: Pre-add an A-type (IPv4) or AAAA-type (IPv6) root domain name resolution, such as: 1.2.3.4 <->yourdomain.comIn the personal center, select the Zerotrust page on the left
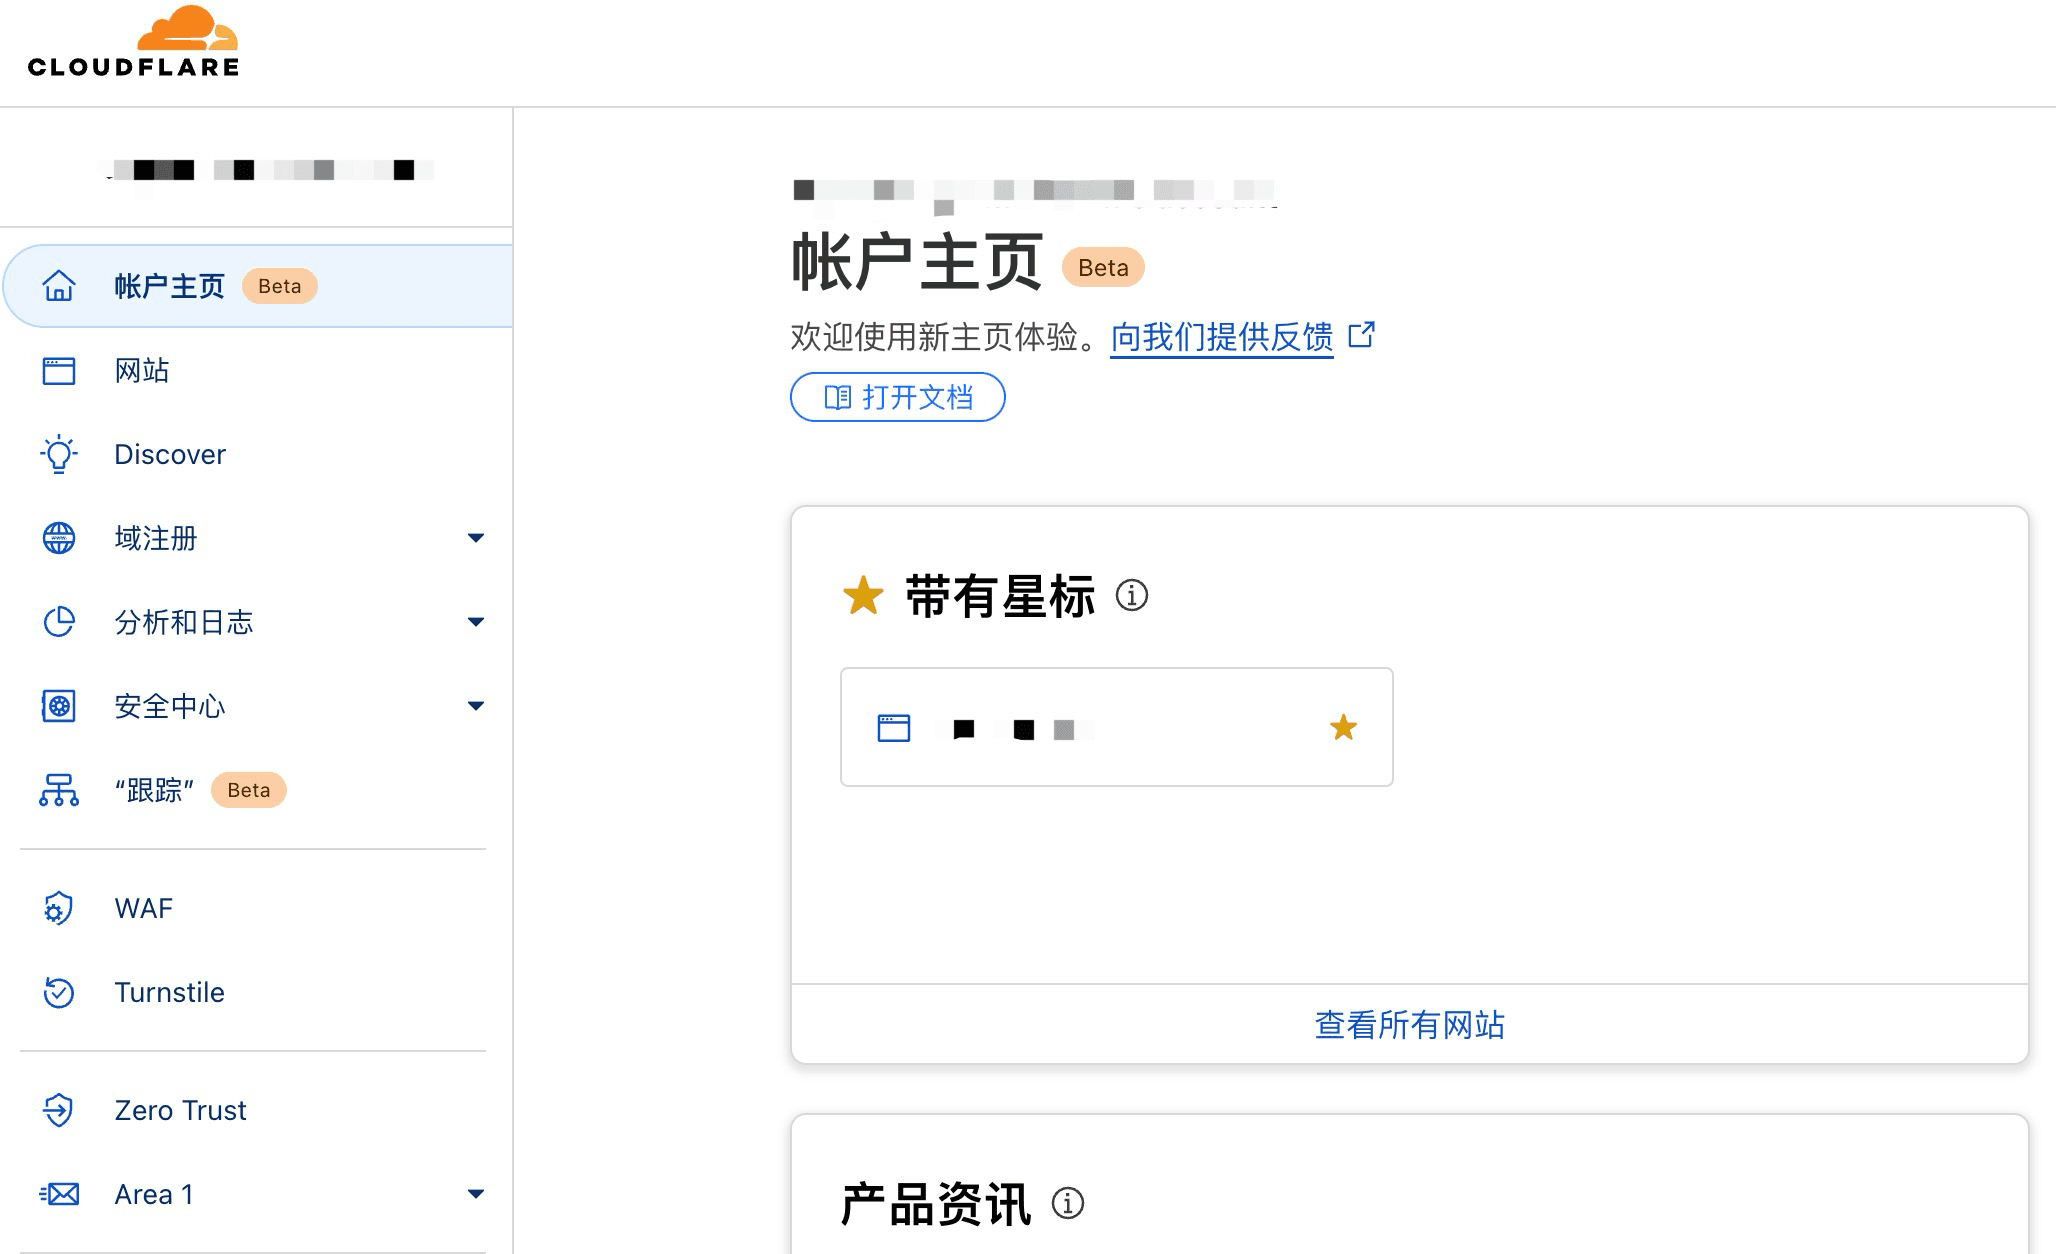
Find Tunnel in the Network menu
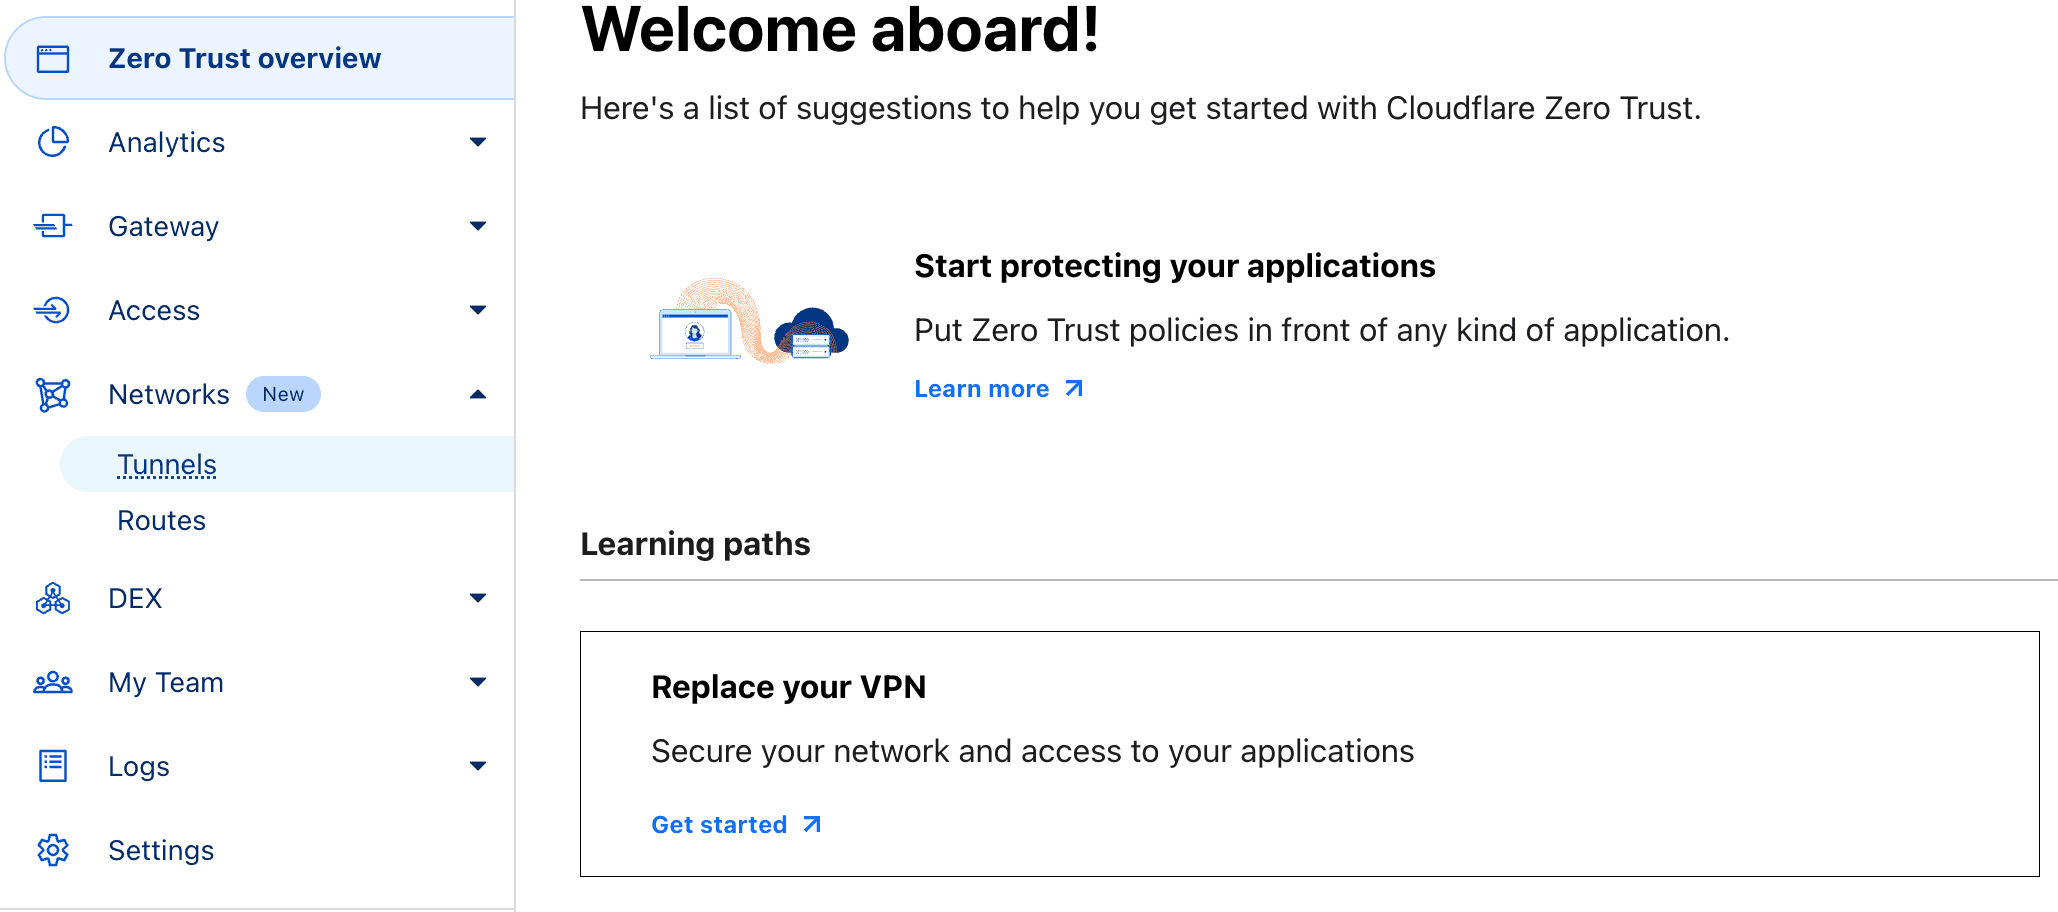
Click Create Tunnel to create a new tunnel
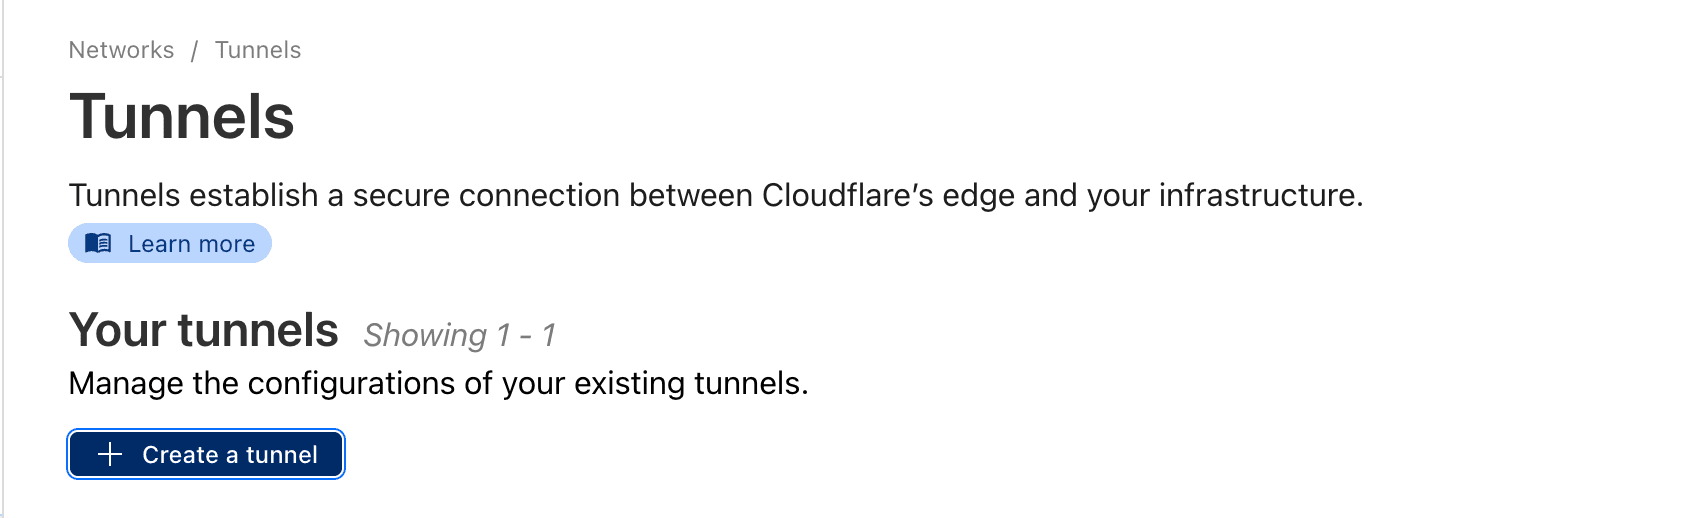
Here, we choose to create using the cloudflared method and select next
Give the tunnel a name

After saving, the installation deployment command will appear. Here, we choose to deploy using Docker
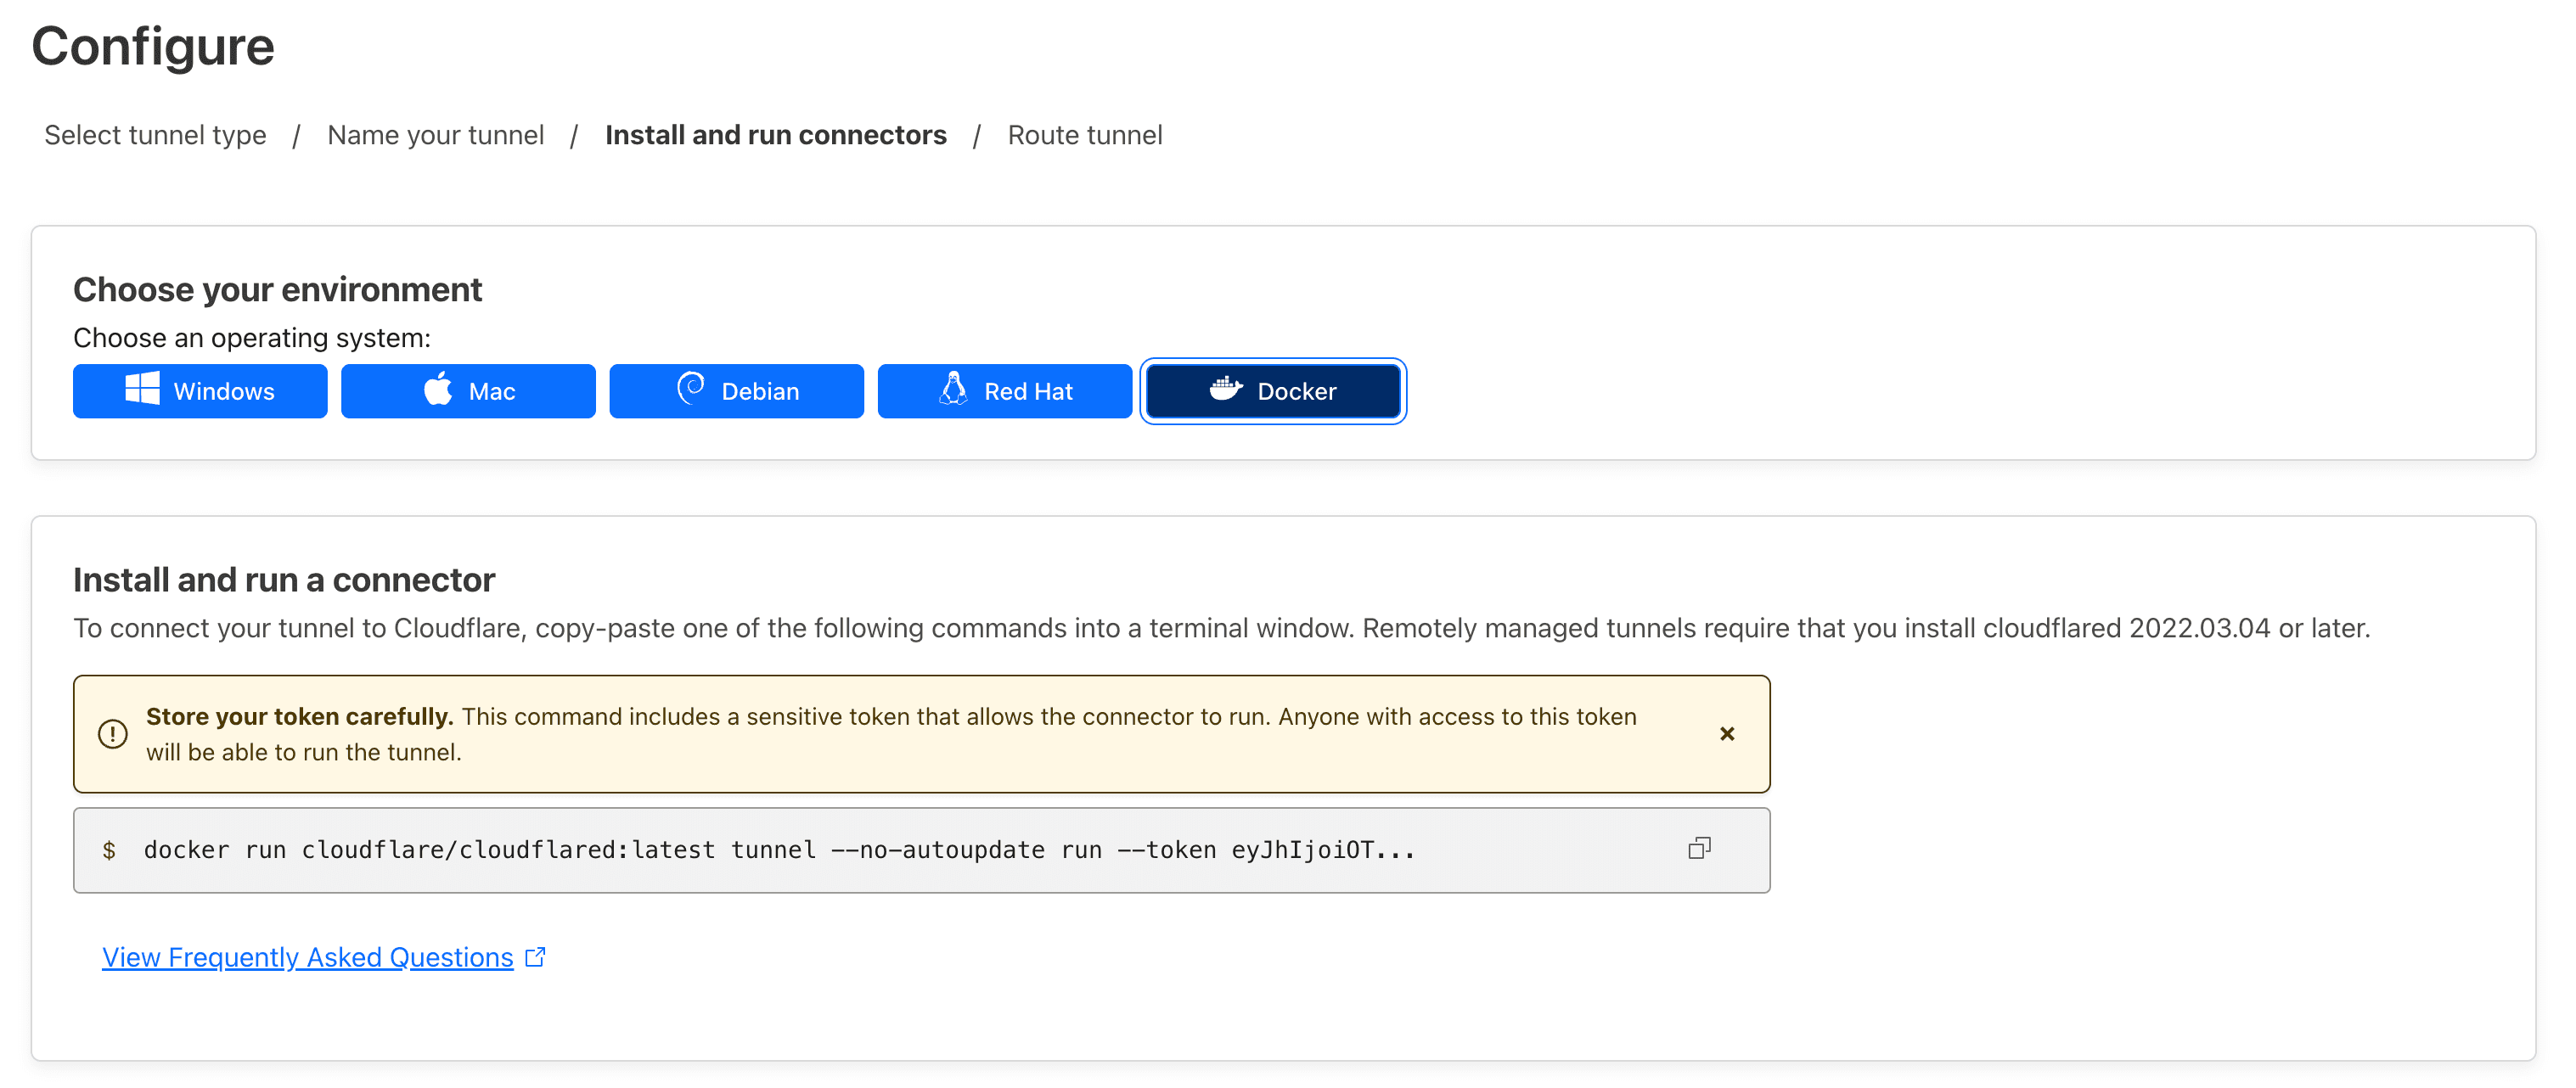 Copy the command and separately copy the long token string (xxxxxxxxxxxx) at the end:
docker run cloudflare/cloudflared:latest tunnel --no-autoupdate run --token xxxxxxxxxxxLog in to the Synology NAS backend, enter Container Manager, search for and download the cloudflared image (the first one in the figure below)

Use the image to run the container, check "Auto-restart"
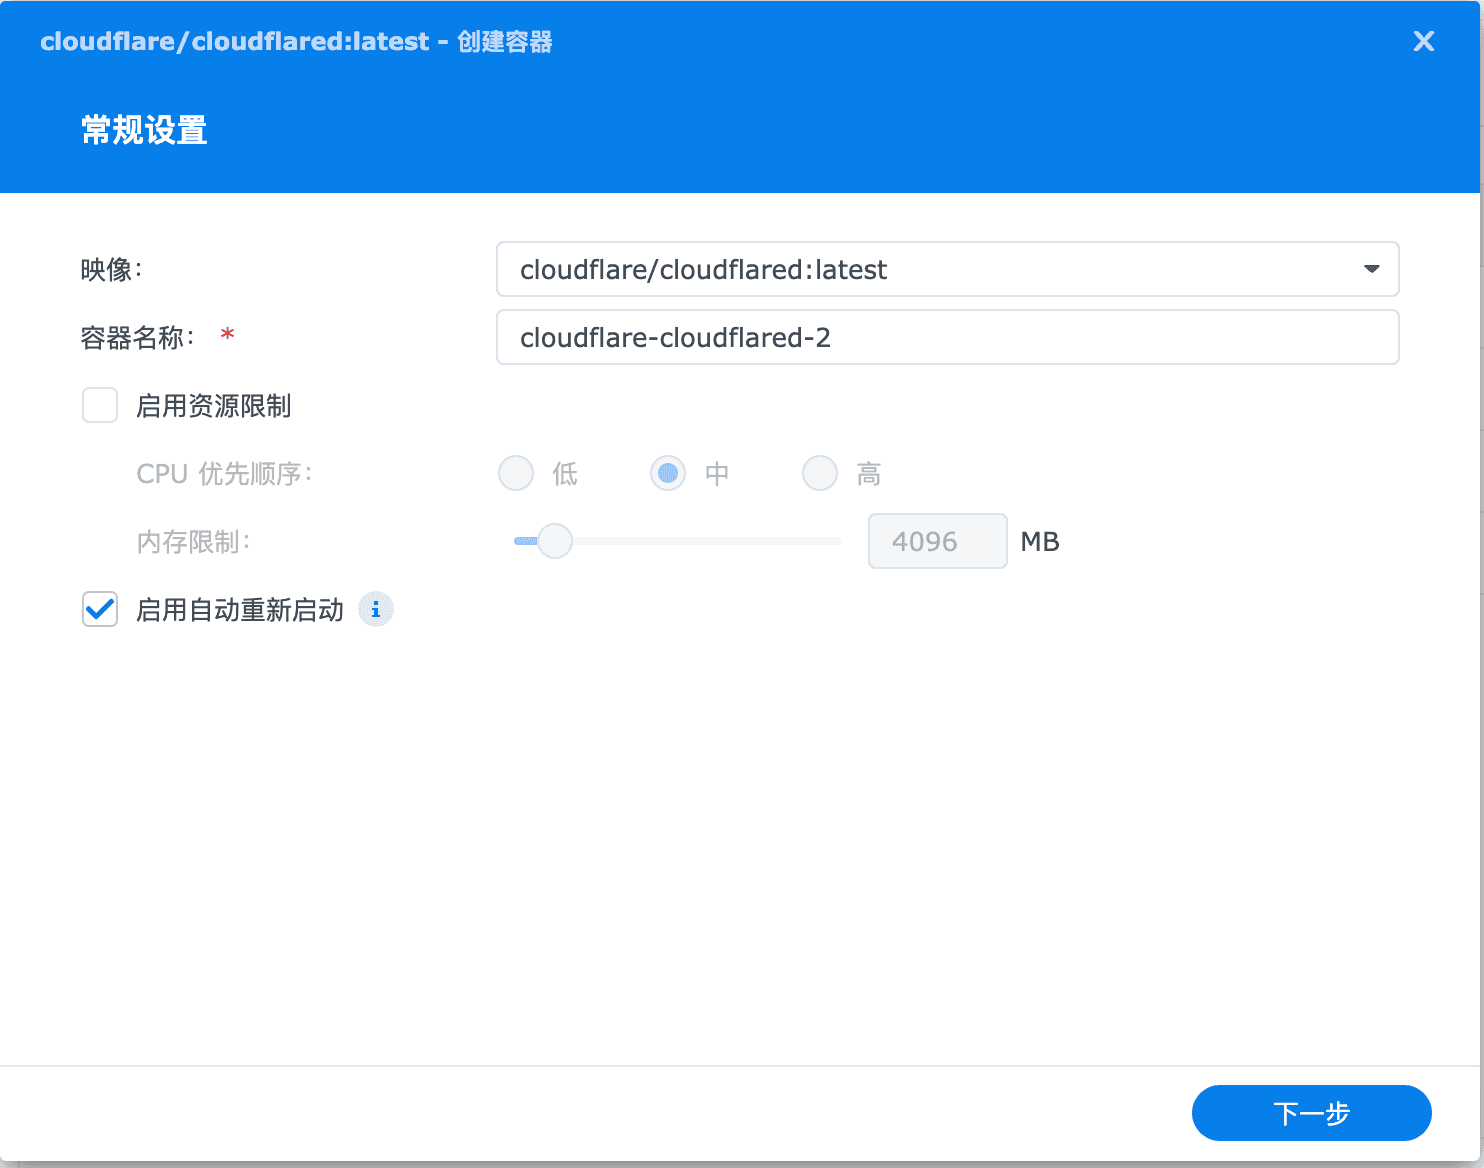
Set the network type to
Host, fill in the command:tunnel --no-autoupdate run --token <token copied from the CF Create Tunnel page>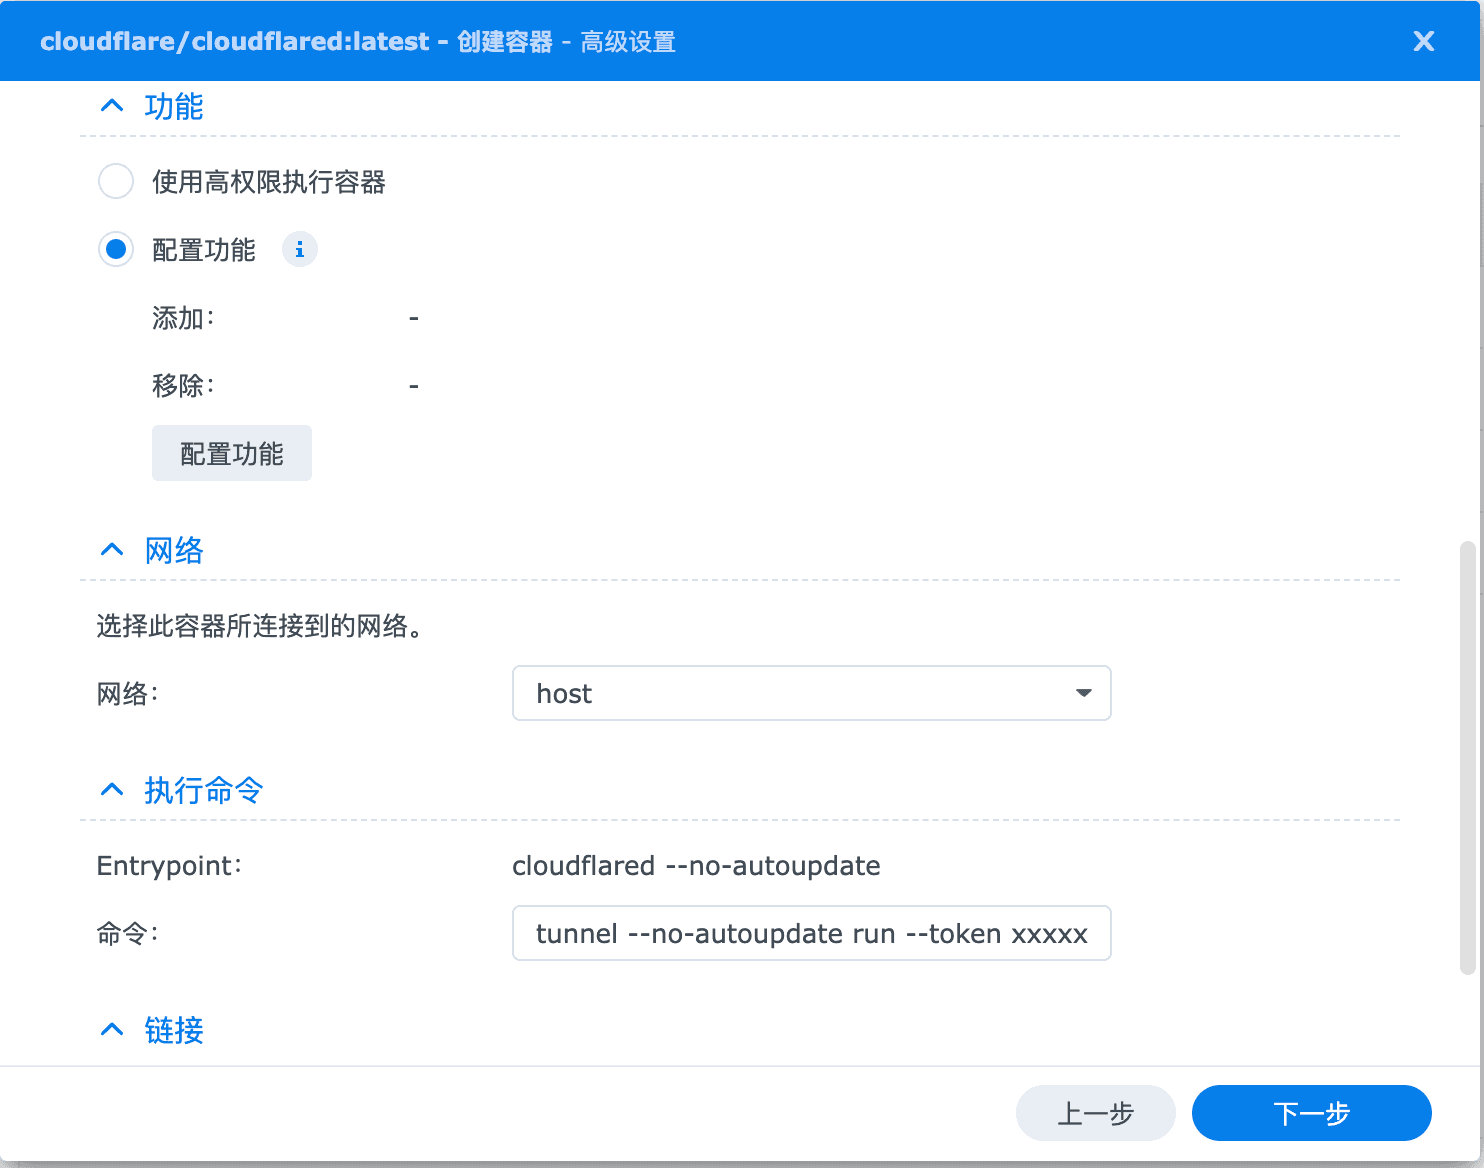 then click Next to start the container.
Go back to the Cloudflare interface, display Status: Healthy, which means the connection is successful

Then create a Public Hostname, which is the public domain name used to access the internal network NAS and other services:
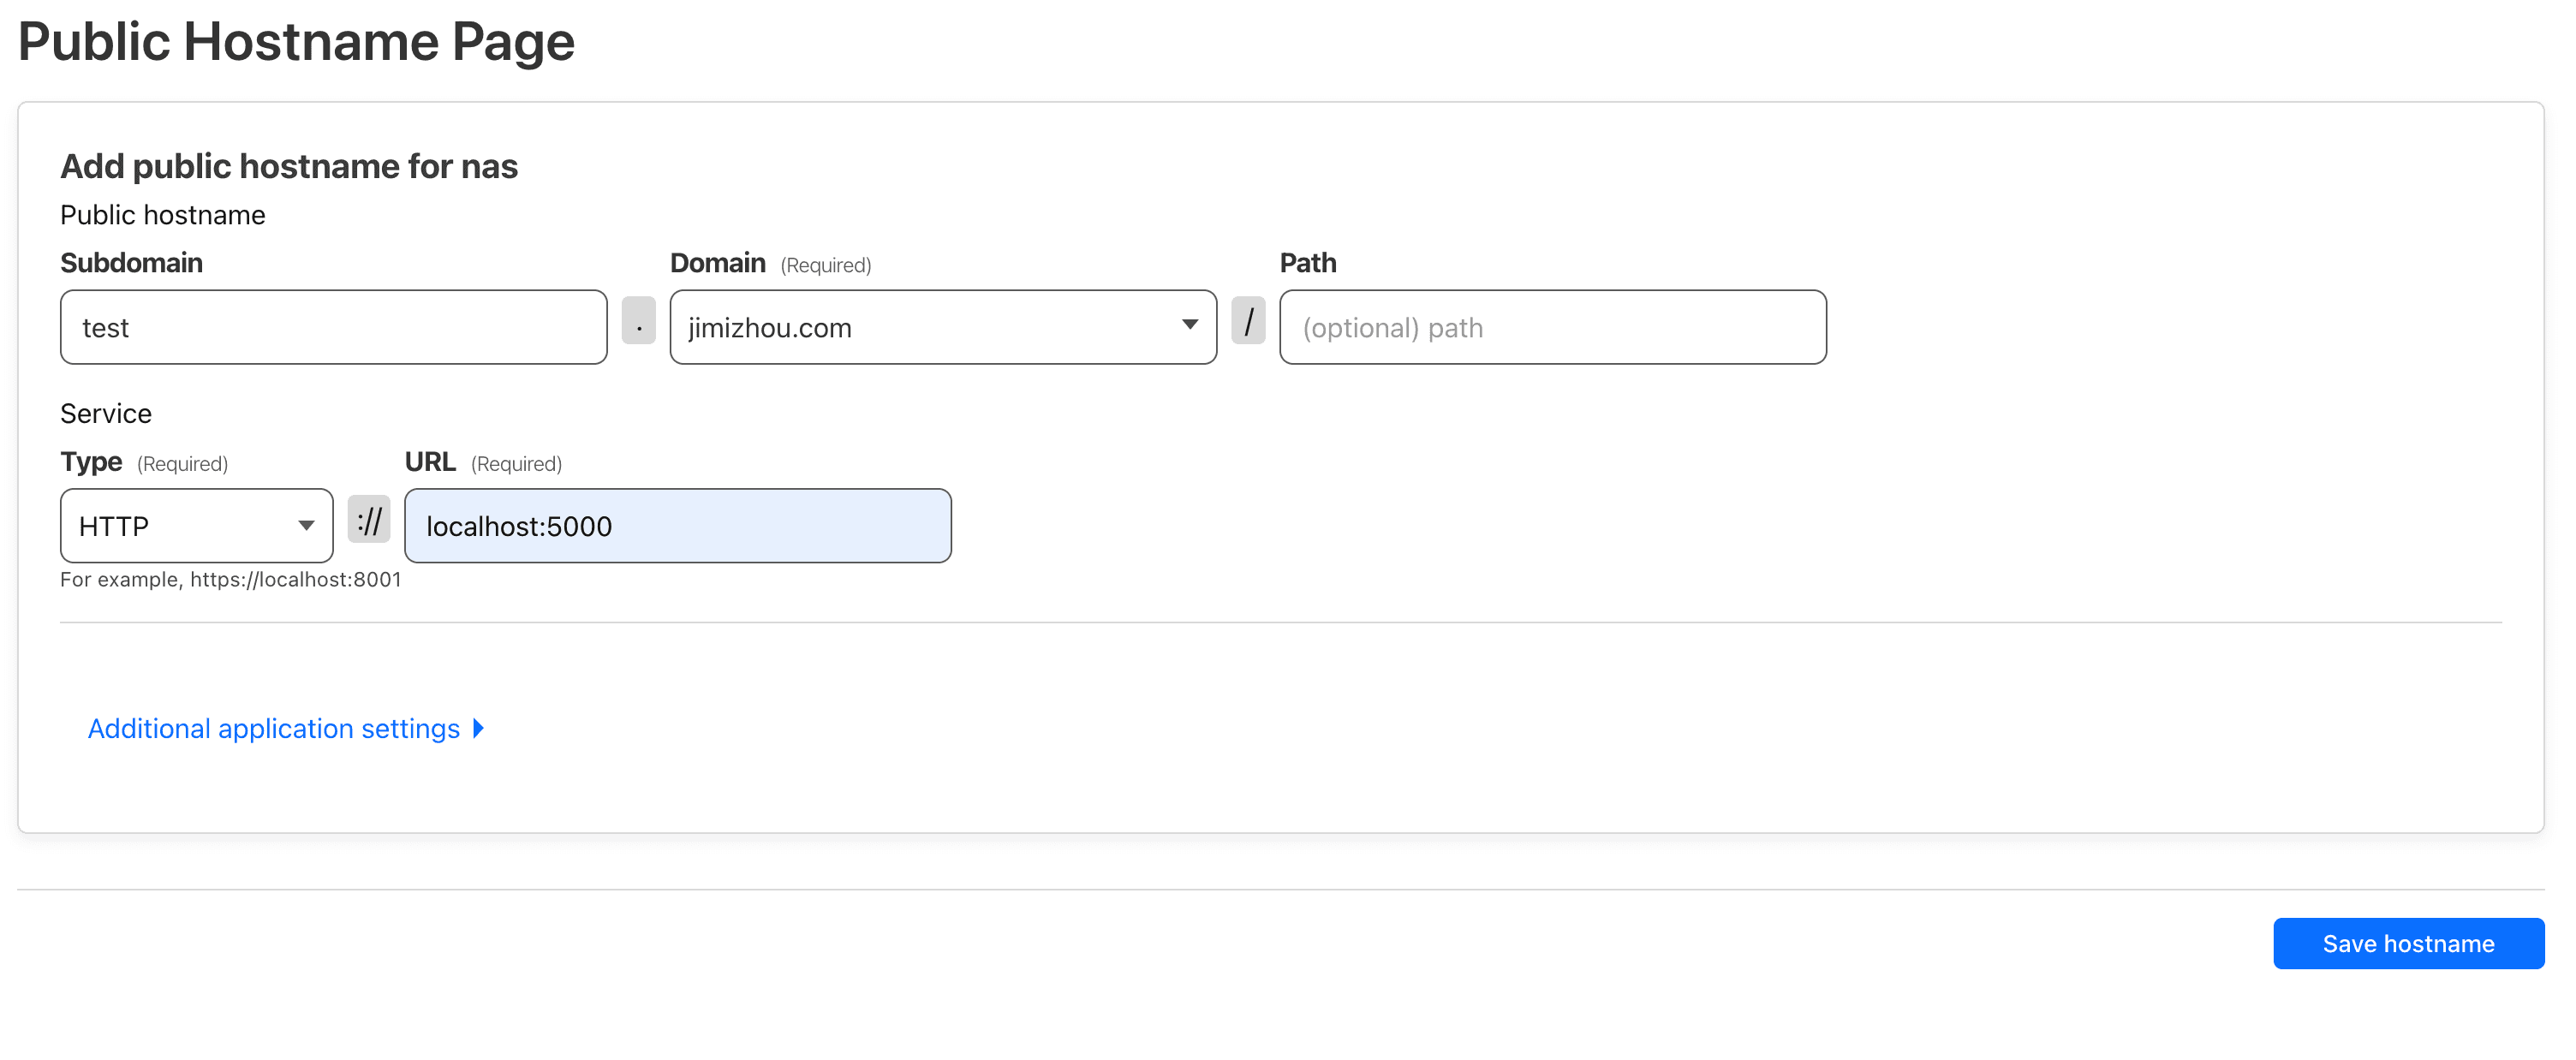 fill in the prefix you need in
 subdomain, select your root domain indomain, choose the type according to your needs, here the Synology web page chooses thehttptype, fill in the address you need to access in the internal network inurl, because we deploy it on Synology, directly inputlocalhost:5000can access the NAS management backend.After saving the above settings, you can access your NAS with test.yourdomain.com !
If there is a certificate/SSL problem:
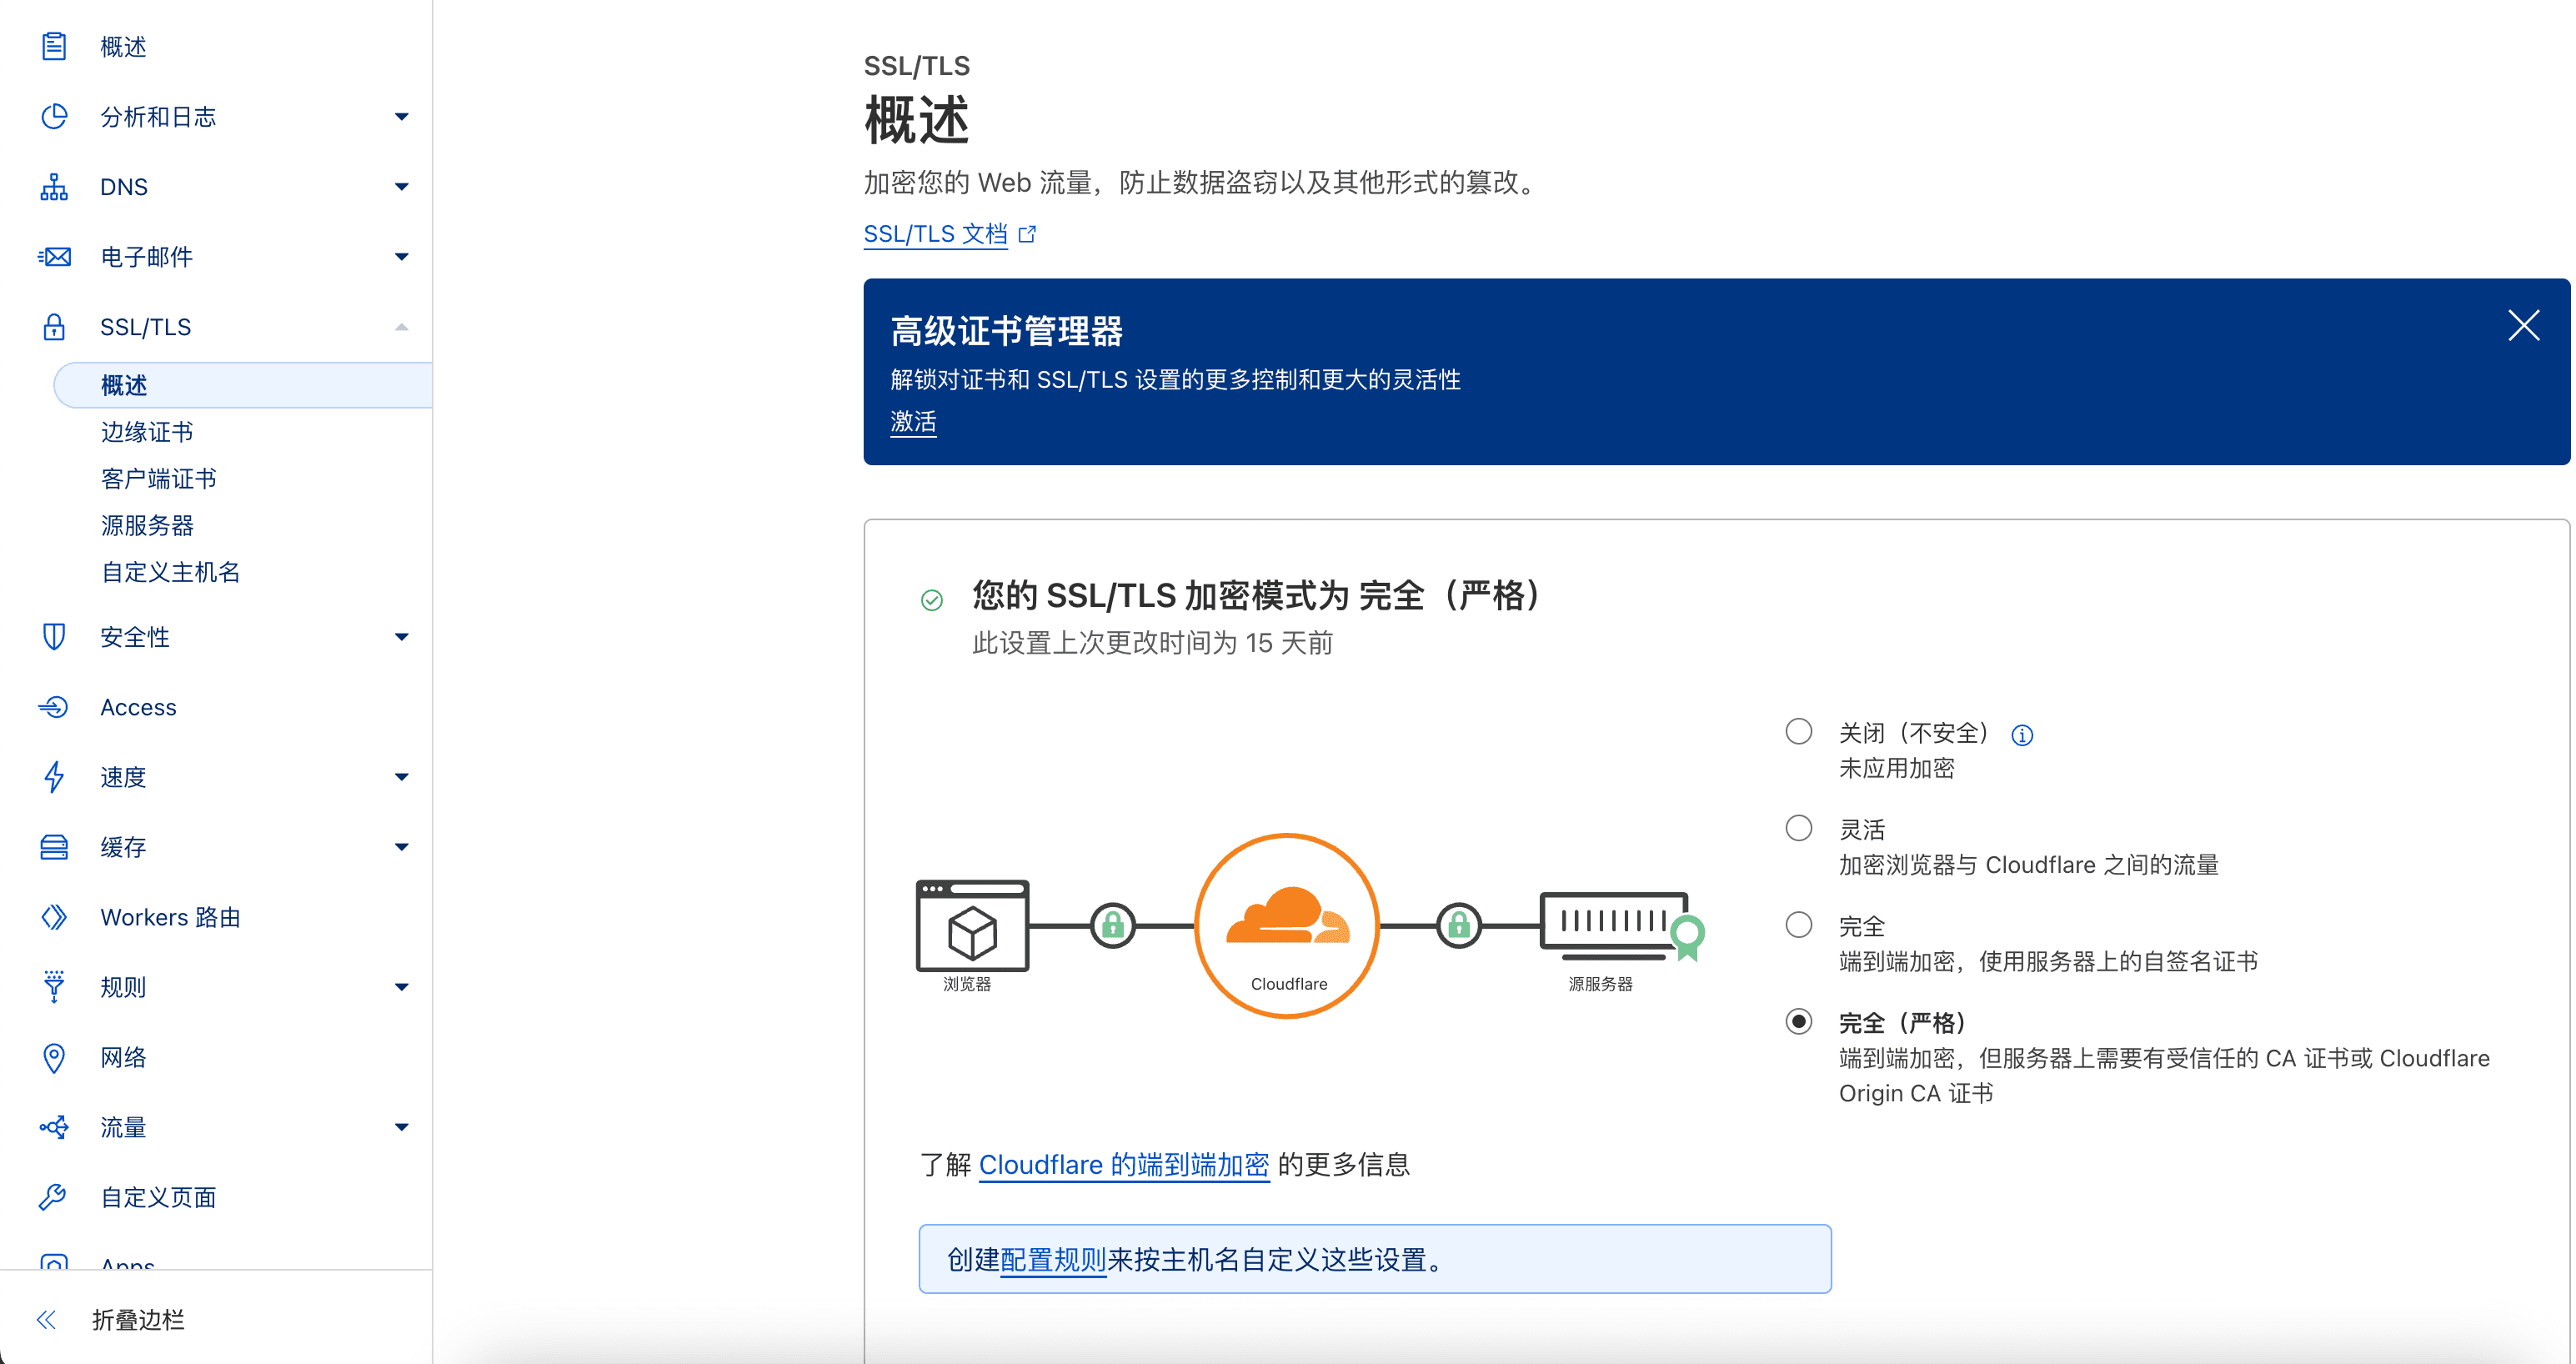
Check if the domain's SSL settings are selected as "Full"
Set the certificate on Synology to Cloudflare Origin CA:
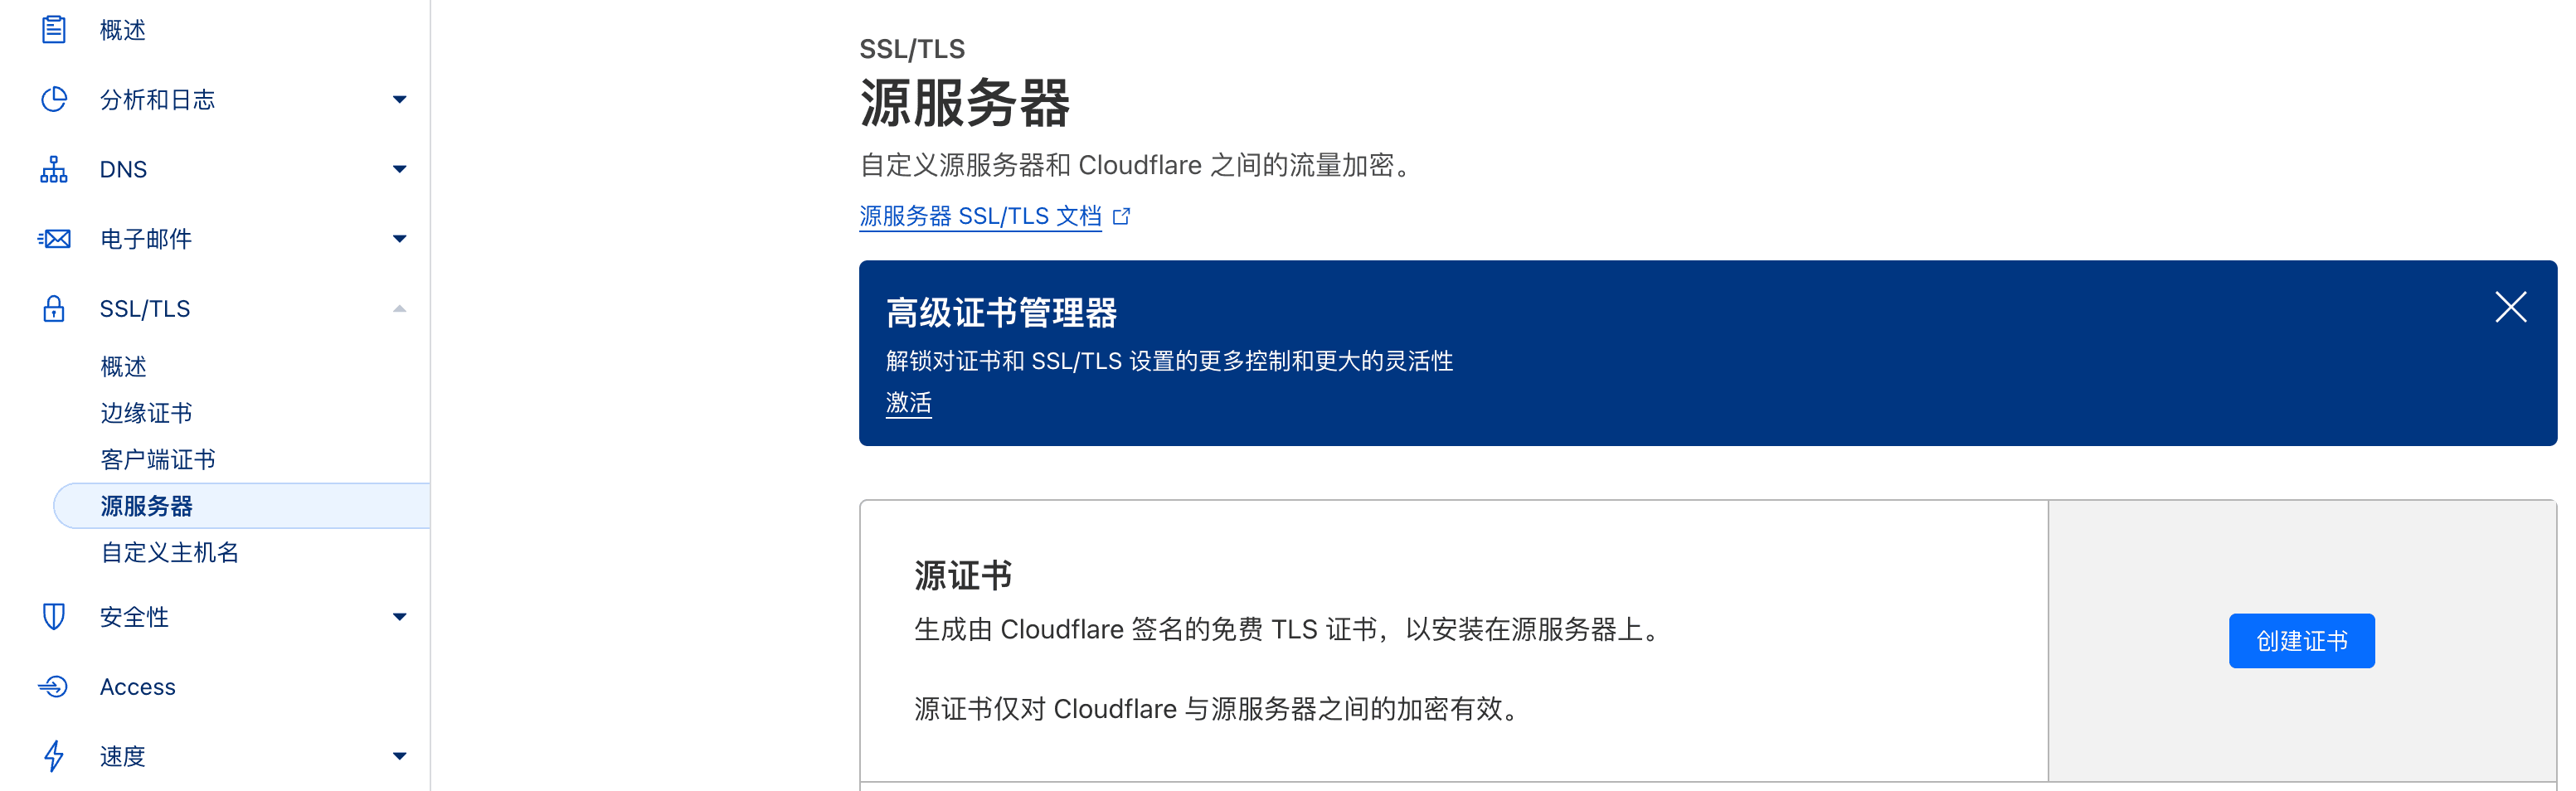
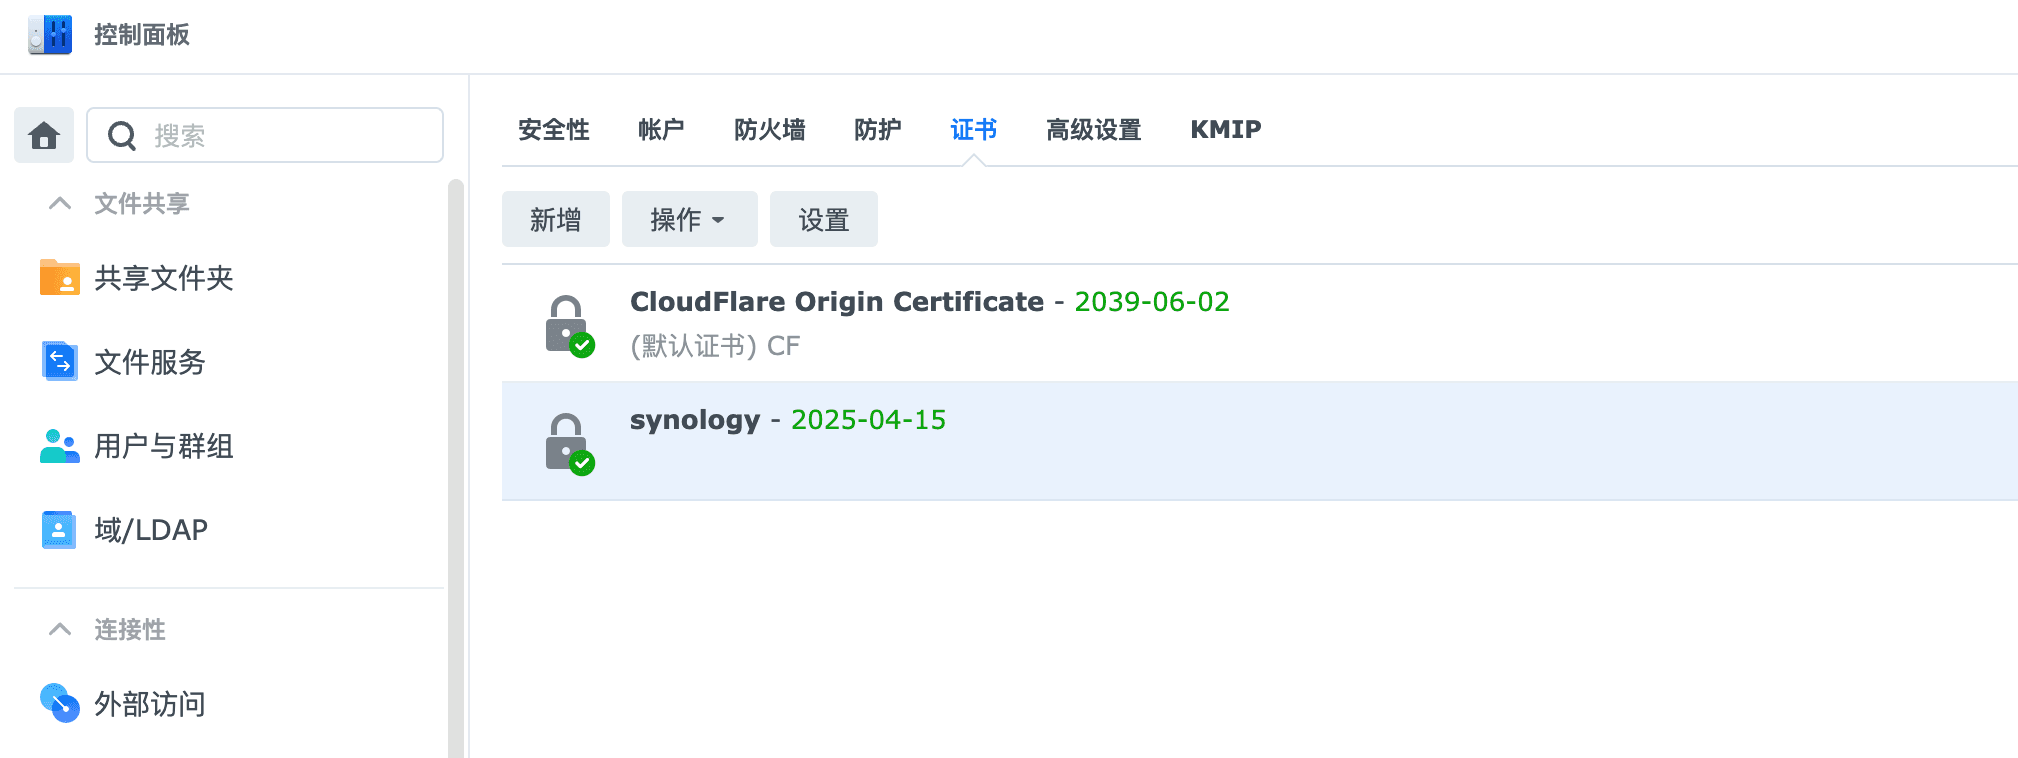 in the SSL/TLS directory, click "Create Certificate" in the "Origin Server" column, save the certificate content as a pem file, save the key as a key file, and import it into Synology as the default certificate.
One more thing
If you feel that the access speed is not ideal when using Tunnel in the domestic network environment, you can consider the following methods to improve it:
Optimization phase one: use CloudflareST to test the most suitable CF node for yourself and modify it to the local computer Hosts to accelerate access:
Optimization phase two: further, use the preferred CF node IP to use another domain name for DNS resolution, so that your friends can access it faster without any optimization
Optimization phase three: on the basis of optimization two, use a DNS service provider that supports domestic and foreign split-flow resolution (such as: DNSPod), resolve the domestic access CNAME to a website that has been optimized by CF (such as:
csgo.com / visa.com), and resolve the foreign CNAME to1.0.0.5, and configure the custom origin domain name in CF, utilizing the existing website to optimize the domestic and foreign lines.The principle is to access these CF-optimized websites through another domain name CNAME, and the traffic reaches the CF edge node, and the origin finds your origin server for access. Note that Cloudflare Tunnel does not support adding another non-CF resolved domain name to Public Hostname, you can add it by constructing a curl command, the specific method: CloudFlare Saas origin to tunnel method
若无法加载请检查网络环境。
若无法加载请检查网络环境,或切回 Disqus 稍后再试。